


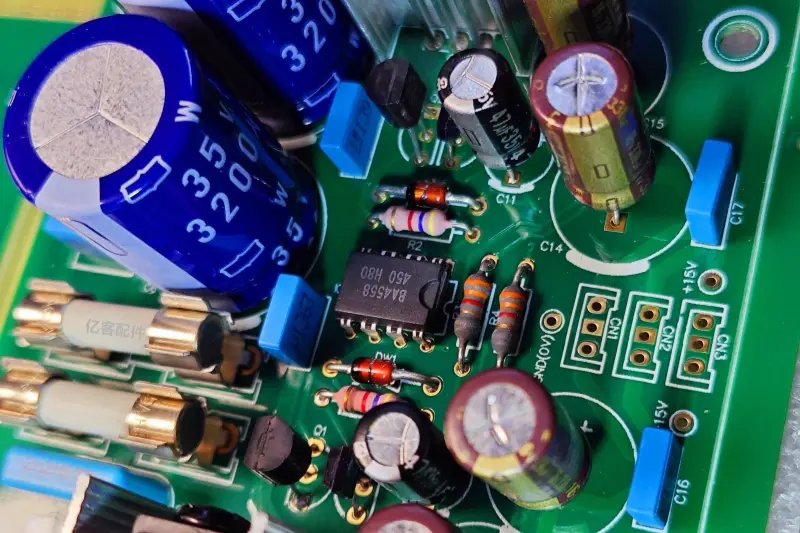
Understanding PCB Basics: Types, Materials, and How They Impact Your Project
When a designer first encounters printed circuit boards, the sheer variety can feel overwhelming. At its core, a PCB is a stack of conductive and insulating layers that mechanically support and electrically connect components. The choices made in this stack—type of board, substrate material, copper weight, and finish—directly shape performance, cost, and manufacturability.
Types of Boards
- Single‑sided boards – Only one copper layer carries traces. They are ideal for simple control circuits, hobby projects, or low‑cost prototypes. Their limited routing flexibility can constrain component density, but the straightforward layout reduces design time.
- Double‑sided boards – Two copper layers, one on each side, linked by plated‑through holes. This design doubles routing options and is a common baseline for consumer electronics. It still remains affordable while allowing modest signal integrity improvements.
- Multi‑layer boards – Four or more layers enable dedicated power, ground, and signal planes. High‑frequency or high‑current designs benefit from reduced impedance and better noise suppression. The trade‑off is higher fabrication cost and tighter design tolerances.
Each type answers a different set of project needs. For a wearable sensor, a double‑sided board may provide enough routing while keeping the device thin. In contrast, a mixed‑signal radio module often justifies a six‑layer stack to isolate RF paths from digital noise.
基板材料
The substrate, sometimes called the “base material,” determines mechanical strength, thermal performance, and dielectric properties.
- FR‑4 (fiberglass epoxy) – By far the most common material, FR‑4 offers a good balance of strength, cost, and electrical characteristics for most hobbyist and commercial projects. Its glass transition temperature (Tg) typically ranges from 130 °C to 150 °C, making it suitable for standard soldering cycles.
- Rogers and other high‑frequency laminates – These polymers have lower dielectric loss, which is crucial for microwave or high‑speed digital circuits. Their higher price reflects the performance gain; a typical Rogers board can support signals well above 5 GHz with minimal attenuation.
- Aluminum‑core (metal‑core) boards – Used when thermal dissipation is a priority, such as LED drivers or power converters. The metal core spreads heat away from hotspots, allowing higher current without excessive temperature rise.
Choosing the right substrate requires matching the board’s operating frequency, temperature environment, and budget. In many cases, FR‑4 suffices, but stepping up to a specialized laminate can prevent costly redesigns later.
Copper Weight and Thickness
Copper weight, expressed in ounces per square foot (oz/ft²), dictates trace current‑carrying capacity and resistance.
- 1 oz copper – Standard for most designs; it supports up to a few amperes on modest trace widths.
- 2 oz or 3 oz copper – Employed when higher currents or lower voltage drops are needed, such as in power distribution networks. Thicker copper also improves thermal conductivity, which can aid heat spreading across the board.
Increasing copper thickness raises material cost and may require larger drill sizes for vias, potentially impacting high‑density layouts. Designers often start with 1 oz copper and only move to thicker copper after a current analysis confirms the need.
Surface Finishes
The final layer that covers exposed copper influences solderability, shelf life, and corrosion resistance. Common finishes include:
- HASL (Hot Air Solder Leveling) – A low‑cost option that provides a solder‑ready surface but can introduce uneven thickness.
- ENIG (Electroless Nickel Immersion Gold) – Offers a flat, reliable finish suitable for fine‑pitch components and long‑term storage, albeit at a higher price.
- Immersion Tin or Silver – Provide good wetting and are often selected for lead‑free compliance.
The finish choice can affect assembly yield, especially for components with very fine pitch leads. For a prototype run, HASL may be acceptable; for a production device with tight tolerances, ENIG is typically safer.
How These Choices Shape Your Project
Every decision ripples through the design process. Selecting a multi‑layer board with a high‑frequency substrate can unlock advanced performance, but it also demands more rigorous design rules and a larger budget. Conversely, opting for a single‑sided FR‑4 board simplifies layout and reduces cost but may force compromises on component placement or signal integrity.
A practical approach is to start with the minimum viable configuration—often a double‑sided FR‑4 board with 1 oz copper and a standard HASL finish—and then evaluate performance against project goals. If the device experiences overheating, excessive noise, or fails to meet timing requirements, the designer can iteratively upgrade one attribute at a time, such as moving to a thicker copper weight or adding a dedicated ground plane on an additional layer.
By understanding the relationship between board type, material, and finish, engineers can make informed choices that balance cost, reliability, and performance, setting a solid foundation for the subsequent steps in the PCB selection workflow.
Defining Project Requirements: Power, Size, Frequency, and Environmental Constraints
When a designer moves from the basics of PCB technology to the practical side of a new product, the first concrete step is to translate the system’s needs into measurable requirements. Power handling, board real‑estate, signal frequency, and the environment in which the board will operate are the four pillars that shape every subsequent decision.
パワー dictates not only the thickness of copper but also the spacing between traces and the choice of solder mask. A high‑current circuit—such as a motor driver or power‑distribution module—may require 2 oz/ft² copper or more, while a low‑power sensor interface can often be satisfied with 1 oz/ft². Designers should calculate the maximum current per trace using the IPC‑2221 standard, then add a safety margin of at least 20 % to accommodate temperature spikes. In practice, this approach prevents overheating and ensures reliable solder joints throughout the product’s life.
サイズ concerns are equally critical. The external dimensions of the enclosure set a hard limit on the PCB footprint, and manufacturers typically quote a cost per square inch that drops sharply as the board grows larger. A common trade‑off involves balancing component density against routing complexity. For compact devices, designers may place components on both sides of the board, employ fine‑pitch packages, or use a higher layer count to keep trace lengths short. Conversely, a larger board can afford wider traces and more generous spacing, which simplifies assembly and reduces the risk of short circuits.
Frequency introduces a different set of constraints. As signal edges become faster, the board behaves more like a transmission line, and impedance control becomes essential. For frequencies below a few megahertz, simple microstrip routing with standard trace widths is usually sufficient. Between 100 MHz and several gigahertz, designers must consider dielectric loss, trace geometry, and via placement to preserve signal integrity. In these regimes, a low‑loss substrate (such as FR‑4 with a higher Tg rating) and controlled‑impedance traces (typically 50 Ω) are often recommended. A quick rule of thumb: if the rise time is under 1 ns, the trace length should not exceed one‑tenth of the wavelength at the target frequency.
Environmental constraints encompass temperature ranges, humidity, mechanical stress, and exposure to chemicals or radiation. A board destined for an automotive engine compartment, for example, must survive temperature cycles from –40 °C to +125 °C and contend with vibration. Selecting a substrate with a higher glass transition temperature (Tg) and applying a robust solder mask can mitigate delamination and coil‑splinter failures. In contrast, a consumer‑grade indoor device may tolerate a standard FR‑4 board and a regular solder mask, but it still benefits from moisture‑resistant coating if the enclosure is not sealed.
To keep the design process organized, many engineers assemble a requirement matrix that rows each functional block and columns for power, size, frequency, and environment. This matrix makes it easy to spot conflicts—such as a high‑frequency RF front end that also needs to handle high current—and to prioritize mitigations.
“A clear set of quantitative requirements is the single most effective tool for preventing costly redesigns later in the product lifecycle.” – Senior PCB design consultant
Transitioning from these high‑level constraints to detailed PCB specifications is the next logical step. The upcoming section will explore how power, trace width, and other requirements map onto layer count, fabrication tolerances, and other manufacturable parameters, ensuring that the board can be built without compromising the original design intent.
MappingRequirements to PCB Specifications: Layer Count, Trace Width, and Fabrication Tolerances
Translating a project’s functional goals into concrete PCB parameters is a critical step that bridges design intent and manufacturability. When the previous section clarified power, size, frequency, and environmental constraints, the next logical question is: how do those constraints dictate the board’s layer stack, the width of its copper traces, and the tolerances that the fab must meet? The answers lie in a blend of electrical theory, mechanical realities, and practical manufacturing limits.
Layer Count – Balancing Complexity and Cost
A single‑sided board can satisfy very simple control circuits, but most modern projects require at least two layers to separate power distribution from signal routing. Adding layers provides dedicated planes for ground and power, which reduces voltage ripple and improves electromagnetic compatibility (EMC). For example, a four‑layer stack typically allocates the inner layers to solid ground and power planes, while the outer layers handle component placement and high‑speed traces.
When the design involves high‑frequency signals—such as those above 1 GHz—or dense analog front ends, a six‑layer or even eight‑layer board may become necessary. Additional layers allow tighter impedance control and enable shorter return paths, which together lower signal loss and crosstalk. However, each extra layer introduces more dielectric material, higher fabrication cost, and longer lead times. Designers often start with a two‑ or four‑layer baseline and only increase the stack if simulation or prototype testing reveals performance shortfalls.
Trace Width – From Current Capacity to Signal Integrity
Trace width is not merely a spacing decision; it directly influences current‑carrying capability, voltage drop, and the ability to maintain characteristic impedance. A common rule of thumb for power traces is the IPC‑2221 standard, which relates width, copper thickness, and temperature rise. For a 1 oz/ft² copper layer (≈35 µm), a 10 A current draw typically requires a trace about 0.6 mm wide to keep the temperature rise under 10 °C.
Signal traces, especially those carrying high‑speed data, are governed more by impedance than by current. The width, spacing, and dielectric thickness together determine the trace’s characteristic impedance (often 50 Ω or 100 Ω differential). A practical example: on a standard FR‑4 substrate with a 0.6 mm dielectric height, a 0.3 mm trace spaced 0.15 mm from its return plane yields close to 50 Ω. Adjusting these dimensions becomes essential when the board must meet strict timing budgets or when the design includes controlled‑impedance transmission lines.
Design tools now automate much of this work, generating width recommendations based on user‑entered constraints. Yet designers should still review the output, confirming that the suggested widths do not violate spacing rules or lead to routing congestion.
Fabrication Tolerances – Ensuring What You Design Is What You Build
Even the most carefully calculated trace width can be compromised if the fab cannot meet the required tolerances. Typical tolerances for trace width and spacing range from ±10 % for standard commercial runs to ±5 % for high‑precision prototypes. For high‑frequency applications, tighter control—sometimes ±2 %—may be demanded to preserve impedance.
Similarly, the board’s overall thickness, hole drilling accuracy, and copper plating thickness affect performance. A deviation of just a few microns in copper weight can alter the resistance of power nets, while misaligned vias may introduce unexpected inductance. When specifying tolerances, it is useful to prioritize the parameters that impact the most critical performance metric. For instance, a designer focused on low‑noise analog circuits might request tighter trace width tolerances, whereas a power‑switching design may emphasize copper weight consistency.
Most reputable manufacturers list their standard tolerance capabilities in their datasheets. If a design exceeds those capabilities, the fab may offer a premium “tight‑tolerance” service at an additional cost. Engaging the manufacturer early—by sharing stack‑up files and tolerance requirements—helps avoid costly redesigns later in the process.
Practical Tips for Aligning Requirements with Specifications
- Start with a realistic layer plan. Use the project’s frequency and power needs to choose a baseline stack, then iterate only if simulations indicate problems.
- Leverage IPC guidelines. Apply IPC‑2221 for power trace sizing and IPC‑2141 for high‑speed impedance calculations to set sensible width targets.
- Document tolerance priorities. Clearly state which dimensions (trace width, spacing, copper thickness) need tighter control, and communicate those needs to the fab.
- Prototype before full production. A small batch of prototype boards can reveal whether the chosen tolerances hold up under real manufacturing conditions.
- Iterate with the supplier. Ask for a fab‑validation report that confirms the board meets the specified tolerances, especially for high‑frequency or high‑current designs.
By thoughtfully mapping power, signal, and environmental demands onto layer count, trace geometry, and fabrication tolerances, designers create a solid foundation for reliable, cost‑effective PCBs. The next section will build on this foundation, exploring how substrate material and copper weight choices further influence reliability and overall budget.
Choosing the Right Substrate and Copper Weight for Reliability and Cost Efficiency

When the previous discussion landed on layer count and trace width, the natural next question is what material beneath those traces will keep the board stable without inflating the bill. The substrate—often called the dielectric—provides mechanical support, electrical isolation, and thermal management. Copper weight, measured in ounces per square foot, determines how much current a trace can carry and how well the board tolerates temperature swings. Together they form the backbone of reliability and cost.
What the substrate does A substrate’s dielectric constant (Dk) influences signal speed, especially for high‑frequency or high‑speed digital designs. Low‑Dk materials such as PTFE (Teflon) or specialized hydrocarbon laminates reduce signal loss, but they carry a premium price. For most hobbyist or moderate‑speed projects, a standard FR‑4 laminate—glass‑reinforced epoxy—offers a good balance: a Dk around 4.5, adequate thermal resistance, and widespread availability at low cost.
When to consider alternatives If the design operates above a few hundred megahertz, or if the board will sit in a harsh environment (high humidity, chemicals, or extreme temperature), a higher‑grade substrate becomes worthwhile. Materials like Rogers RO4000 series or polyimide provide superior thermal stability and lower loss, but they also increase per‑square‑inch cost by 30‑50 % compared to FR‑4. A common approach is to reserve these premium laminates for critical layers—such as the signal layer that carries the fastest edges—while keeping the remaining layers on FR‑4.
Copper weight: balancing current capacity and cost
Copper weight directly affects trace resistance. The rule of thumb is that a 1 oz/ft² (35 µm thick) copper trace can safely carry about 0.5 A per mil of width in a typical ambient temperature. Doubling the copper to 2 oz reduces resistance by roughly half, allowing narrower traces for the same current, but the cost rises proportionally because the foil is thicker and the etching process becomes slower.
Practical guidelines
- Low‑power boards (<1 A total) – 1 oz copper is usually sufficient. It keeps the board thin, reduces material waste, and keeps the price low.
- Power distribution networks or motor drives – 2 oz copper is a safe default, especially when traces must feed regulators or connectors that see several amps.
- High‑current or thermal‑critical sections – consider 3 oz or copper‑heavy “heavy‑copper” stacks. These are common in LED drivers or battery‑management boards where heat dissipation is a concern.
Choosing a heavier copper layer also improves the board’s ability to spread heat, which can be critical when components generate localized hotspots. However, thicker copper makes drilling smaller vias more difficult, potentially increasing via cost or limiting the minimum via size.
Trade‑offs and cost‑impact
| Factor Light option (1 oz, FR‑4) Heavy option (2 oz+ or premium substrate) | ||
| Initial material cost | 低い | Moderate‑to‑high |
| Manufacturing complexity | Simple, fast etch | Slower etch, tighter drill tolerances |
| Current capacity | Limited; wider traces needed | Higher; narrower traces acceptable |
| Thermal performance | Adequate for low‑heat designs | Better heat spreading, lower temperature rise |
| Signal integrity at high speed | Sufficient for <500 MHz | Superior for >1 GHz, lower loss |
A frequent mistake is to over‑specify copper weight to shrink trace width, only to discover that the board house charges extra for tighter tolerances and the cost advantage disappears. In practice, designers often find a sweet spot by modestly increasing copper (to 1.5 oz when the house offers it) and keeping the layout efficient, rather than leaping to 2 oz or more.
Decision‑making checklist
- Assess maximum current per net – calculate using the IPC‑2221 chart or an online trace‑width calculator.
- Identify high‑frequency signals – if any trace exceeds a few hundred megahertz, prioritize low‑loss substrate for that layer.
- Consider mechanical stress – boards that will be flexed or mounted in tight enclosures benefit from a higher‑ Tg (glass transition temperature) FR‑4 variant.
- Check the fab’s capabilities – many mid‑range manufacturers have a standard offering of 1 oz FR‑4 with optional 2 oz and limited premium laminates. Align the design with what the fab can produce without special tooling.
- Budget constraints – allocate extra cost only where reliability or performance truly gains; otherwise stay with the default stack.
By following this flow, designers can justify a higher‑cost substrate or copper weight only when the performance or reliability gains outweigh the added expense. The next step will explore how component density and placement interact with these material choices to meet overall performance goals.
Evaluating Component Density and Placement Strategies to Meet Performance Goals
Transitioning from the discussion on substrate and copper weight, the way components are packed and positioned on a board becomes the next pivotal factor in achieving the required electrical performance. High‑density layouts can reduce board size and material cost, yet they also introduce challenges such as increased parasitic capacitance, signal crosstalk, and thermal bottlenecks. Understanding these trade‑offs enables designers to choose a placement strategy that aligns with the project’s speed, power, and reliability targets.
Component density is typically expressed as the number of parts per unit area (e.g., components per square inch). A dense arrangement is attractive for handheld devices, wearables, or any product where board real‑estate is at a premium. However, as the spacing between traces shrinks, the inductive and capacitive coupling between adjacent signal lines grows. In practice, this can degrade high‑frequency signal integrity, cause timing jitter, or even trigger unintended oscillations in analog circuits.
A common approach to mitigate these effects is to group components by function and frequency domain. For example, placing all high‑speed digital ICs together, while isolating noisy power‑switching parts from sensitive analog blocks, reduces the likelihood of cross‑interference. In addition, routing critical high‑frequency traces on inner layers with dedicated ground planes provides a stable return path and curtails electromagnetic emissions.
When density becomes a constraint, stack‑up design offers a useful lever. By adding extra dielectric layers, designers can route certain signal families on separate layers, effectively separating them without expanding the board’s footprint. This technique also permits tighter trace widths because the dielectric thickness can be reduced for inner layers, lowering the impedance of controlled‑impedance lines. The trade‑off is an increase in fabrication cost and a more complex DFM (design‑for‑manufacturability) review.
Thermal considerations are another decisive element. Power‑dense modules such as voltage regulators, motor drivers, or RF power amplifiers generate significant heat. If placed too close together, heat accumulation can raise junction temperatures beyond the component’s rating, leading to premature failure. A practical rule of thumb is to keep high‑power parts at least one to two millimeters apart and to provide copper heat sinks or thermal vias beneath them. In practice, designers often use “thermal islands” – dedicated copper pours that connect to the board’s internal planes – to spread heat away from hotspots.
Below is a checklist that helps balance density with performance:
- Functional clustering: Group similar‑speed or similar‑sensitivity components together.
- Layer assignment: Reserve inner layers for critical high‑speed traces with continuous ground planes.
- Spacing rules: Apply stricter clearance for high‑power devices and high‑frequency signal pairs.
- 熱管理: Add thermal vias, copper pours, or heat spreaders where needed.
- Design rule checks (DRC): Run automated checks for crosstalk, impedance, and temperature hotspots early in the layout phase.
Beyond these guidelines, designers should evaluate the impact of component orientation. Rotating a polarized part (such as a diode or a crystal) to align its pins with the dominant trace direction can shorten critical paths and reduce the number of vias needed. Fewer vias mean lower parasitic inductance, which is especially beneficial for high‑frequency clock distribution networks.
In many projects, an iterative approach proves most effective. A first‑pass layout may prioritize minimizing board size, then simulation tools are used to assess signal integrity and thermal performance. If simulations highlight issues, the layout can be adjusted by loosening component spacing or reallocating signal layers. This feedback loop continues until the design meets the specified performance envelopes without exceeding budgetary or manufacturability limits.
Looking ahead, the next logical step is to consider how the chosen density and placement strategy influences the assembly process. Selecting the appropriate solder mask, surface finish, and testing methodology will ensure that the densely populated board can be reliably fabricated and inspected. The following section explores these assembly considerations in detail.
Selecting Suitable Assembly Processes: Solder Mask, Surface Finish, and Testing Options
Choosing the right assembly process can be as critical as selecting the board substrate. A well‑matched solder mask, surface finish, and testing regimen protect the circuitry, ensure reliable solder joints, and keep production yields high. The following discussion walks through each decision point, highlights common trade‑offs, and offers practical tips for designers who need a dependable yet cost‑effective solution.
Solder mask selection The solder mask shields copper traces from oxidation, prevents solder bridges, and provides a visual cue for component placement. Two mask types dominate the market:
- Epoxy‑based (liquid photoimageable, LPI) – offers excellent adhesion and chemical resistance, making it the default choice for most medium‑volume boards. It tolerates standard reflow temperatures and is compatible with most surface finishes.
- Dry‑film (film‑based) – delivers tighter registration and thinner layers, which can be advantageous for very fine pitch components or high‑frequency designs where dielectric loss matters. The downside is higher material cost and more complex handling.
When the design includes densely packed BGAs (ball‑grid arrays) or micro‑via arrays, a dry‑film mask often reduces the risk of mask slippage during reflow. For simpler, low‑to‑moderate density boards, an LPI mask provides a reliable, budget‑friendly option.
Surface finish options The surface finish determines how the board’s copper pads will accept solder. Three finishes are most frequently specified:
- HASL (Hot Air Solder Leveling) – a thin tin coating applied by dipping the board in molten solder. It is inexpensive and works well for standard leaded components. However, the relatively rough surface can impede fine‑pitch solderability, and the finish may re‑flow under high‑temperature processes, potentially causing pad deformation.
- ENIG (Electroless Nickel Immersion Gold) – deposits a thin layer of nickel followed by a gold over‑coat. ENIG provides a flat, oxidation‑resistant surface ideal for fine‑pitch and lead‑free assemblies. The gold barrier also improves shelf life. The trade‑off is higher material cost and the possibility of “black pad” defects if the nickel plating is not properly controlled.
- Immersion Tin/Immersion Silver – these provide a flat surface at a lower cost than ENIG. Immersion tin is easy to rework but can whisker over time, while immersion silver offers good conductivity but is more prone to tarnish in humid environments.
A practical rule of thumb: select ENIG when the design uses components with pitch under 0.5 mm or when the board will sit idle for extended periods. For robust, cost‑sensitive products with larger pads, HASL remains a solid choice. Immersion finishes work well for short‑run prototypes where quick turn‑around outweighs long‑term reliability concerns.
Testing strategies Even with perfect material choices, defects can emerge during assembly. Integrating appropriate testing early in the workflow catches problems before costly rework. Three testing levels are commonly employed:
- 目視検査 – a manual or automated optical inspection (AOI) step that verifies solder mask alignment, component placement, and obvious solder defects. AOI is especially valuable for boards with high component density, where human eyesight may miss minute bridges.
- Electrical testing – includes continuity checks, short‑to‑ground detection, and functional test vectors. Flying probe testers are flexible for low‑volume runs, while bed‑of‑nails fixtures become cost‑effective for larger production batches.
- X‑ray inspection – essential for hidden joints such as BGA, QFN, or CSP (chip‑scale package) solder balls. X‑ray reveals voids, insufficient wetting, or misalignment that visual methods cannot see.
Designers should match the testing level to the board’s risk profile. A prototype destined for a consumer gadget may only need visual inspection and basic continuity testing, whereas a medical device or aerospace component warrants full X‑ray analysis and functional verification.
Putting it all together A typical decision flow might look like this:
- Assess component density and pitch → choose dry‑film mask and ENIG if fine‑pitch BGA is present; otherwise, LPI mask with HASL or immersion finish.
- Consider environmental exposure → if the board will encounter moisture or long storage, prefer ENIG or a well‑controlled immersion silver to avoid oxidation.
- Define testing budget and criticality → allocate AOI for every board, add flying probe for medium volume, and reserve X‑ray for any hidden‑joint designs.
“Choosing the right combination of mask, finish, and test not only improves first‑pass yield but also reduces long‑term field failures.” – a seasoned assembly engineer
By aligning these three elements with the project’s performance, reliability, and cost targets, designers can move confidently from schematic to a manufacturable board ready for the next section, where budgeting strategies will be explored.
Balancing Cost and Performance: How to Prioritize Features When Budget Is Tight

A common dilemma in PCB projects is deciding which specifications can be relaxed without compromising the core function. When the budget cannot accommodate the ideal component mix, layer count, or finish, designers must make deliberate trade‑offs. This section walks through a systematic approach that aligns cost constraints with performance goals, ensuring the final board delivers what matters most.
Start with the mission‑critical requirements Identify the features that directly affect the product’s purpose. For a sensor hub, signal integrity and voltage tolerance may be non‑negotiable, while aesthetic considerations such as board color are optional. By marking each requirement as must‑have, nice‑to‑have, or optional, teams create a hierarchy that guides subsequent decisions.
Assess the cost impact of each tier Typical cost drivers include:
- Number of copper layers (single‑sided boards are cheapest; multi‑layer stacks add material and processing fees)
- Trace width and spacing (tight geometries require finer etching, raising fab charges)
- Surface finish (HASL is inexpensive, ENIG provides better solderability but costs more)
- Component density (high density may need advanced assembly, bumping up labor costs)
Quantifying these factors, even roughly, helps reveal where the biggest savings lie. For example, moving from a 4‑layer to a 2‑layer board can cut material costs by 20‑30 % while still meeting low‑frequency requirements.
Match cost reductions to performance tolerance Not every reduction will affect performance equally. Consider these scenarios:
- Layer reduction: If the design operates below 100 MHz, a 2‑layer board often suffices, but high‑speed digital signals may suffer from increased crosstalk on fewer planes.
- Wider traces: Increasing trace width eases manufacturing but raises copper loss, which can matter in power‑delivery paths.
- Simpler finish: Switching from ENIG to HASL may increase the risk of cold solder joints, yet in a low‑volume hobby project the risk is acceptable.
By pairing each cost‑saving option with its performance implication, designers can eliminate choices that would break essential functionality.
Apply a weighted scoring model A lightweight method involves assigning points to each feature based on importance (e.g., 5 for must‑have, 3 for nice‑to‑have, 1 for optional). Then, score each design alternative by adding the points of the features it retains. The highest‑scoring option that fits the budget becomes the recommended compromise. This quantitative view reduces bias and provides a clear rationale for stakeholders.
Leverage standard parts and existing footprints Using off‑the‑shelf components with widely supported footprints often lowers both component cost and design effort. When a bespoke part would add $0.30 per unit, substituting a standard resistor network can shave that expense while still meeting the electrical spec. Moreover, standard parts tend to have better yield rates, indirectly saving money on rework.
Iterate with suppliers early Engaging the PCB fab or assembly house during the trade‑off analysis yields realistic cost data. Many suppliers offer cost calculators that adjust prices based on layer count, board size, and finish. Early quotes prevent surprises later and may uncover volume discounts for certain choices, such as ordering copper in bulk or selecting a common panel size.
“A disciplined cost‑performance matrix turns budget pressure into a design advantage rather than a compromise,” notes an experienced manufacturing consultant.
Practical checklist for tight budgets
- Verify that the signal frequency permits fewer layers.
- Consolidate power nets to reduce copper thickness requirements.
- Choose a surface finish that meets reliability needs without excess expense.
- Opt for larger component footprints when space permits, simplifying assembly.
- Re‑evaluate the need for advanced testing (e.g., AOI) if functional testing suffices.
- Confirm that any reduction does not violate regulatory or safety standards.
Preparing for the next step Having trimmed the design to its cost‑effective core, the project is ready to focus on manufacturability. The upcoming section on DFM (Design for Manufacturability) will explore how to fine‑tune layout details—such as pad sizes, via placement, and component orientation—to further reduce risk and expense before handing the board off to the supplier.
Optimizing Design for Manufacturability: DFM Best Practices and Common Pitfalls to Avoid
Design‑for‑manufacturability (DFM) is the bridge between a clever schematic and a reliable, cost‑effective board. Even when component selection, layer count, and substrate choices have been locked in, subtle layout decisions can turn a smooth production run into a costly re‑work cycle. The following practices keep the design friendly to the entire supply chain, while highlighting frequent mistakes that catch engineers off guard.
Start with clear design rules early Most PCB manufacturers publish a Design Rule Check (DRC) file that defines minimum trace widths, spacing, annular rings, and drill tolerances for a given stack‑up. Importing that file into the CAD tool at the outset forces the layout to stay inside the manufacturable envelope. When the rules are applied from the first copper pour, the need for later clean‑up is dramatically reduced.
Maintain consistent copper‑to‑pad ratios A common pitfall is placing pads that are too small relative to the copper width. If a 0.3 mm pad is paired with a 0.2 mm trace, the resulting annular ring may fall below the typical 0.1 mm minimum, increasing the chance of solder bridges or open circuits during assembly. A practical guideline is to keep the pad diameter at least twice the copper width, which provides a comfortable margin for both drilling and solder flow.
Avoid acute angles and excessive via density Sharp 45‑degree corners concentrate current and can ignite etching errors, especially on fine‑line boards. Rounding corners not only improves electrical performance but also eases the plating process. Likewise, packing vias too tightly can cause drill wobble, copper delamination, or insufficient epoxy flow. A good rule of thumb is to leave at least twice the drill diameter between neighboring vias; this space also helps the fab crew place soldermask accurately.
Plan for thermal relief and heat dissipation Heat‑sunk components—such as power MOSFETs or high‑current inductors—require generous copper pours with thermal relief patterns that balance electrical resistance and thermal conduction. Over‑isolating a pad with a thin spoke pattern may look tidy on the screen but can cause the part to overheat during operation. Designers should use a “fat‑spoke” approach: wider spokes (often 0.3 mm or more) that still meet the fab’s minimum spacing rules.
Simplify the silkscreen and soldermask A cluttered silkscreen can hinder optical inspection and obscure critical markings during assembly. Moreover, text or graphics placed too close to copper edges can cause unwanted soldermask openings. Keeping silkscreen elements at least 0.2 mm away from any copper feature reduces the risk of accidental mask removal. The same principle applies to soldermask openings; only expose the pads and pads‑related copper that truly need it.
Check for component‑pad mismatches early Standard footprints are a lifesaver, but they are not universal. A common error is using a generic pad size for a component that actually requires a larger or smaller copper area. This mismatch often shows up only after the fab returns a “pad size error” note, leading to delays. Cross‑referencing the component datasheet with the library footprint before routing prevents the last‑minute scramble.
Validate design with a manufacturer’s DFM checklist Many suppliers provide a DFM checklist that covers common concerns such as minimum drill size, via tenting, component clearance, and panelization constraints. Running through this checklist before ordering a prototype catches issues that automated DRC tools might miss, such as panel‑wise spacing for wave‑solder versus selective‑solder processes.
“A well‑structured DFM review is more valuable than any simulation; it catches the practical issues that software cannot predict.” – Experienced PCB production manager
Avoiding re‑work: the cost of ignoring DFM When a design violates a fabrication rule, the fab may either reject the file outright or attempt a workaround that increases lead time and cost. For example, a board with 0.05 mm spacing on a 4‑layer FR‑4 stack may force the fab to switch to a tighter process, adding a premium that could have been avoided with a modest redesign. In practice, the extra expense of redesign and delayed time‑to‑market far outweighs the modest effort of adhering to DFM guidelines from the start.
Transition to the next step Having refined the layout for manufacturability, the design is now ready for a systematic selection workflow. The upcoming section will walk through a step‑by‑step process—from reviewing the finalized specifications to confirming capabilities with chosen suppliers—ensuring that the optimized design translates into a smooth production experience.
Implementing a Step‑by‑Step PCB Selection Workflow: From Specification Review to Supplier Confirmation
A clear, repeatable workflow turns a vague set of requirements into a manufacturable board that arrives on time and on budget. After polishing the design for manufacturability, the next logical move is to formalize the selection process. The following steps guide engineers from the moment the specification sheet is reviewed to the instant a supplier signs off on the order.
1. Verify the specification checklist Before contacting any vendor, double‑check that every design parameter has a documented value: operating voltage, maximum current, board dimensions, layer count, copper weight, surface finish, and required testing. A quick spreadsheet audit helps catch missing entries that could cause a quote mismatch later.
2. Map requirements to standard PCB families Most manufacturers group boards into families such as “standard FR‑4, 1 oz copper,” “high‑frequency Rogers, 2 oz copper,” or “flexible polyimide.” Align the project’s needs with the closest family to reduce lead time. For instance, if the design calls for a 0.5 mm thickness and 4‑layer stack‑up, the standard 4‑layer FR‑4 offering will usually satisfy the requirement without a special order.
3. Generate a short‑list of qualified suppliers Use criteria that matter to the project:
- Capability to meet the chosen PCB family (e.g., ability to produce 6‑mil trace/spacing).
- Proven track record with the required volume range.
- Geographical location relative to the assembly house (to minimise shipping delays).
- Availability of online quoting tools for rapid iteration.
A quick web search combined with an internal supplier database typically yields three to five viable candidates.
4. Request detailed quotations When requesting quotes, include a concise brief that contains:
- Gerber files (or an ODB++ package) and a Bill of Materials (BOM).
- Explicit finish, solder mask color, and testing requirements.
- Desired delivery window and any compliance standards (e.g., RoHS).
Ask each supplier to break down the cost into material, fabrication, testing, and tooling. This transparency makes it easier to compare offers beyond the headline price.
5. Evaluate quotes against a decision matrix Create a simple matrix with weighted criteria such as cost (30 %), lead time (25 %), quality certifications (20 %), and communication responsiveness (15 %). Assign scores to each supplier and calculate a total. The matrix approach removes bias and surfaces the best overall option, not just the cheapest one.
6. Perform a risk assessment Even a top‑scoring supplier can pose hidden risks. Review the following:
- Recent capacity constraints or back‑order notices.
- History of non‑conformances in similar projects.
- Availability of a clear escalation path for urgent issues.
If a supplier shows any red flags, consider a backup vendor from the short‑list.
7. Confirm the final design package Before the supplier signs a production order, send a final “design for manufacture” (DFM) review package. Include:
- Updated Gerbers with any last‑minute tweaks.
- A clear drawing of board dimensions and mounting holes.
- A signed sign‑off checklist confirming that all tolerances, clearances, and testing requirements have been reviewed.
A short email exchange confirming receipt of the package and the intended production start date seals the agreement.
8. Secure a purchase order and track progress Generate a purchase order that references the quoted price, agreed lead time, and any special handling instructions. Most suppliers provide an online portal where the order status can be monitored. Setting up automated notifications for key milestones—such as “fabrication complete” or “first electrical test passed”—helps the project manager stay ahead of potential delays.
9. Conduct a final acceptance review When the boards arrive, perform a visual inspection, verify dimensions with a caliper, and run a basic electrical test (continuity, isolation). Document any discrepancies and engage the supplier immediately. A well‑structured workflow ensures that any issues are resolved before the boards move to assembly, protecting downstream schedules.
By following these nine steps, engineers transform a collection of technical specs into a reliable procurement process. The workflow not only improves confidence in the selected PCB but also builds a repeatable relationship with suppliers—setting the stage for smoother hand‑offs in future projects.
よくある質問
- What are the main PCB types and materials, and why do they matter for my project?PCB basics cover the types (single‑sided, double‑sided, multilayer), substrate materials (FR‑4, Rogers, polyimide), and how these affect electrical performance and cost.
- How do my power, size, and environmental constraints translate into PCB specifications?Project requirements such as power, size, frequency, and environmental conditions dictate layer count, trace width, and copper weight, which in turn impact reliability and cost.
- When should I select a specific substrate or copper weight for my design?Choosing the right substrate and copper thickness balances durability with budget; thicker copper improves current handling, while high‑frequency substrates reduce losses.
- What DFM best practices can I follow to ensure a smooth, cost‑effective PCB production?Design‑for‑manufacturability (DFM) practices like proper trace spacing, standardized drill sizes, and clear solder mask definitions help avoid costly re‑works and improve yield.

