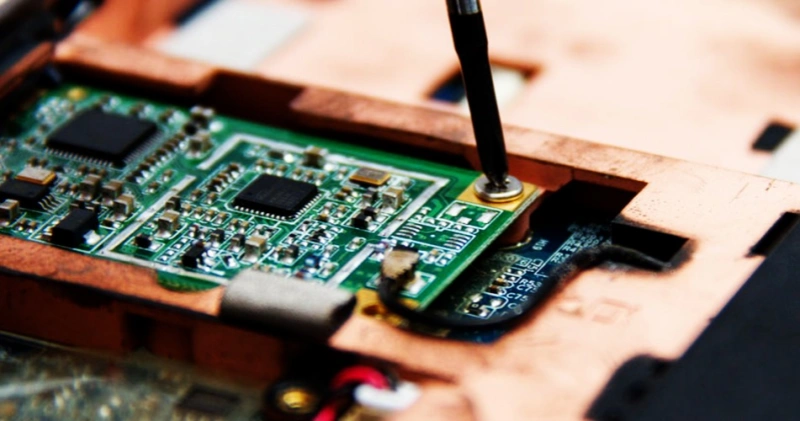

















Turning a bare PCB into a product ready for customers takes more than soldering components. You need enclosures, cables, connectors, and often firmware. Box build assembly – also called electronic box build or system integration – handles all of that. It takes your Lắp ráp bảng mạch in (PCB) and puts it into a final housing with every wire and label. Then the product is tested and packed for shipment.
What is a Box Build Assembly?
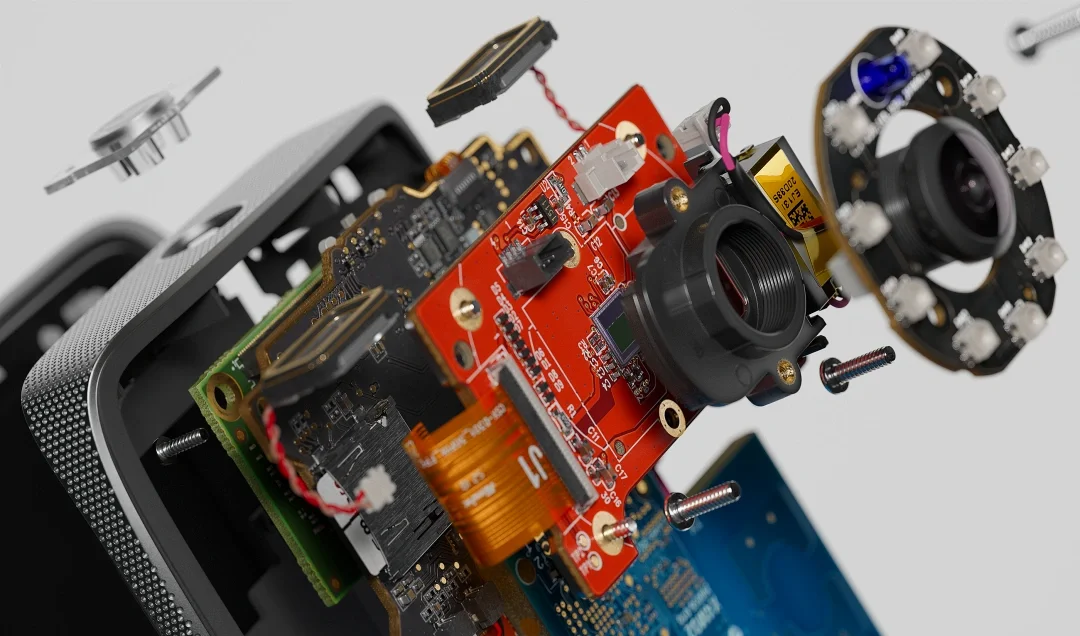
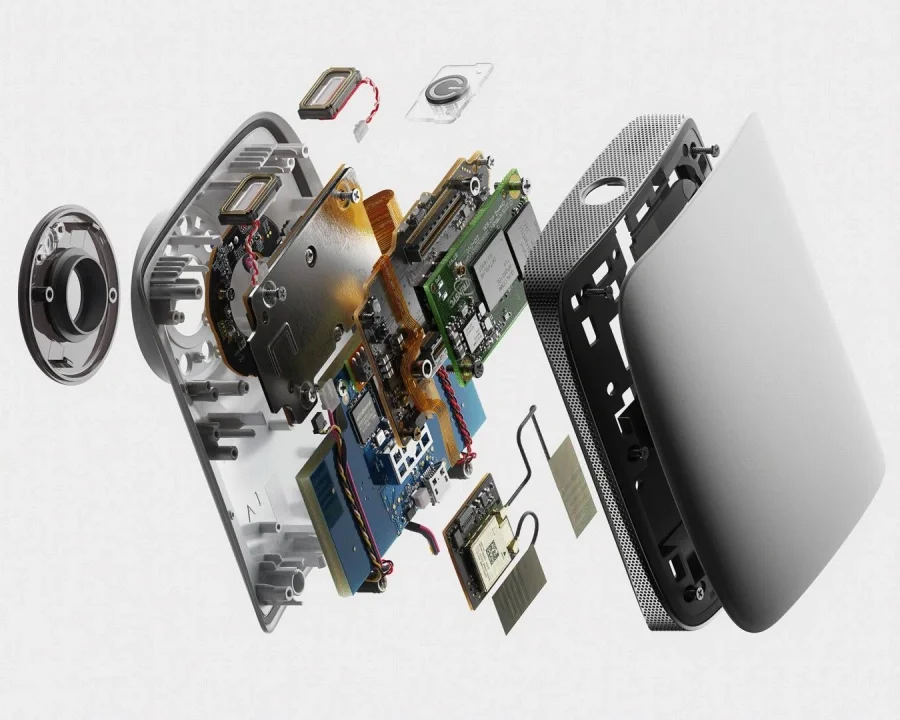
A box build assembly is the complete integration of printed circuit board assemblies (PCBAs) into an enclosure. It includes all internal wiring, connectors, brackets, and peripheral components. The result is a finished product that can be powered on, tested, and sold to the end user.
Key components in a typical box build:
- Enclosure – sheet metal or plastic box
- Lắp ráp bảng mạch in (PCB) – the main electronics
- Cable assemblies and wiring harnesses – internal power and signal wires
- Connectors – panel-mount or board-mount for external interfaces
- Sub-assemblies – heat sinks, fans, brackets, standoffs, displays, sensors
- Firmware/software – pre-loaded or programmed in-line
- Packaging and labeling – final product packing and branding
The box build process consolidates multiple suppliers into one system assembly partner. As a designer, you send your bill of materials and PCB files. The assembler sources all mechanical and electrical parts, builds the cables, integrates everything, tests it, and ships a ready-to-use unit.
The Box Build Assembly Process Step-by-Step
Every box build assembly follows a structured flow. Understanding it helps you design better and avoid delays.
1. Design and Planning
The project starts with a complete design review. We check mechanical compatibility, component lead times, and thermal requirements. A good assembler will give feedback on connector placement, internal cable routing, and fastening points. This step prevents costly rework later.
2. Component Preparation
All parts are kitted and inspected. Enclosures are machined – cutouts for connectors, cable inlets, and vents are added. Wiring harnesses are pre-cut, stripped, crimped, and labeled. PCBs are assembled and tested. Every part is checked for damage before the real assembly begins.
3. Main Assembly
Operators mount the tested PCBA inside the enclosure. They secure boards with standoffs and screws. Panel-mount connectors are fitted into the pre-machined cutouts. Heat sinks and fans are attached with thermal interface material. All sub-assemblies are installed according to the build instructions.
4. Wiring and Connectivity
Cable assemblies and wiring harnesses connect boards, power supplies, and external connectors. Cable ties and strain reliefs keep wires secure and away from sharp edges. This step is critical – a loose cable can cause field failures or EMC issues.
5. Firmware Integration
If the product needs software, the box build partner flashes the firmware. This can happen during assembly (in-line) or even before parts are kitted. Later in this article we explore the three common methods and their cost impact.
6. Testing and Quality Control
A full box build must undergo functional testing. You must confirm that all connectors work, the power-up sequence is correct, and the firmware runs as expected. We often use custom test fixtures and bed-of-nails setups. We also perform hipot tests for safety and sometimes EMC pre-scans. Testing at every stage catches defects early, reducing field failures.
7. Final Inspection and Packaging
Finished products are visually inspected for scratches, loose hardware, and proper labeling. Then they are packed with accessories and manuals. The box build assembly partner applies customer labels and ships directly to your warehouse or end users.
Box Build Assembly Benefits: Why Outsource the Whole System?
Many hardware teams start by managing multiple vendors themselves. Scaling up, that approach breaks. An experienced box build assembly service offers clear advantages.
Cost-Effectiveness
A turnkey box build partner leverages volume pricing on enclosures, wires, and connectors. For moderate volumes (100–500 units), labor and overhead for a typical box build add $8–$15 per unit, excluding BOM. In-house assembly with a $30/hour technician often exceeds $20 per unit when you account for learning curves and rework. When you also consider the cost of managing three or four suppliers separately, outsourcing is the smarter move.
Improved Product Quality
Our factory operates under IPC-A-610 Class 2 and 3 workmanship standards. These define acceptable solder joints, crimp quality, and cleanliness. Box build assembly with a certified partner ensures every wire and screw meets known inspection criteria. Rigorous testing at each assembly stage catches misaligned connectors and incorrect wiring before they leave the floor.
Speed to Market
A single partner handles everything – Sản xuất bảng mạch in (PCB), component purchasing, enclosure machining, and final assembly. Lead times compress because there is no handoff delay between separate vendors. For a typical project, total turnaround from approved design to packaged product can be 6 to 8 weeks.
Regulatory Compliance and Safety
When you product requires CE, UL, or other marks, the final integrated unit must be re-tested. A box build assembler that understands EMC challenges can pre-scan your product with a near-field probe, catching emission problems before formal certification. This proactive step can save over $10,000 in re-test fees. We also ensure that all materials comply with RoHS and REACH.
Custom Enclosures: Sheet Metal Fabrication for Your Product
Custom enclosures give your product a unique identity and perfectly fit your PCB. In box build assembly, the most common custom material is sheet metal.
Sheet metal is durable, easy to machine, and offers extremely low tooling cost compared to injection molded plastic or extruded aluminum. For a custom design, the tooling (punching dies) for sheet metal can start at $500 to $1,500. Injection mold tooling often costs between $5,000 and $20,000. For production volumes under 5,000 units, sheet metal is the economical choice.
Our sheet metal fabrication process includes:
- Laser cutting and CNC punching
- Bending and folding to precise dimensions
- Welding corners for rigidity (or using screw-fastened assembly for easy rework)
- Drilling and tapping for PCB standoffs, hinges, and cable inlets
- Surface finishing: powder coating, passivation, or anodizing
Design tip: For panel-mount connectors, you must design cutouts with a tolerance. We recommend an enclosure cutout oversized by 0.5 mm around the connector outline. This allows the connector body to float slightly, preventing stress when the lid is closed. The PCB itself should be mounted with three points – two rigid and one floating – to avoid stress fractures on BGAs or large QFPs when the enclosure thermally expands.
EMI shielding: Sheet metal enclosures naturally provide shielding, but seams and cable inlets can leak. We use EMI gaskets between lid and base, and conductive tape over seams when required. A near-field probe scan after final assembly can identify radiation hotspots before formal EMC testing – a service we always recommend.
Off-the-Shelf Enclosures: When Standard Makes Sense
Sometimes your product does not need a custom metal box. Standard plastic or metal enclosures from electronics distributors work well for prototypes and smaller volumes. These enclosures become cost-effective at 100s of units because you avoid tooling charges entirely.
But even standard boxes need modification. Our machining department precision-cuts inlets for D-sub connectors, USB ports, and cable glands. We can add ventilation slots, holes for LEDs, and mounting bosses. The result is a professional, ready-to-use housing without the upfront investment of custom sheet metal.
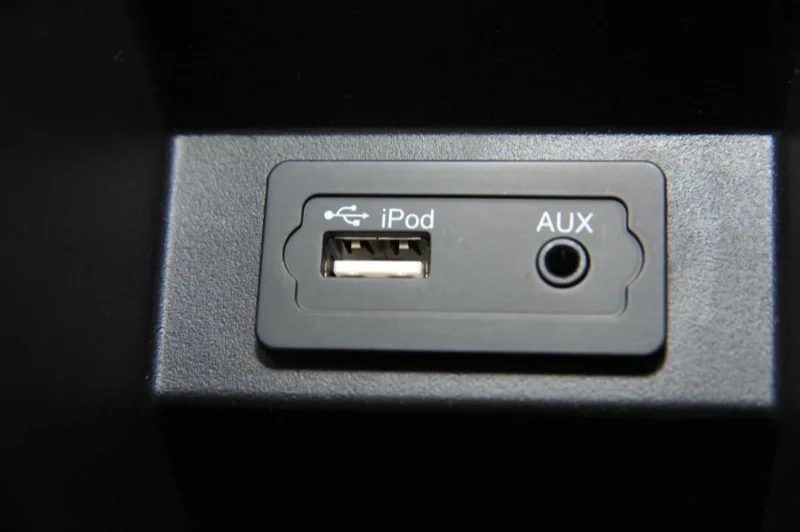
The main trade-off is styling. Off-the-shelf enclosures limit your industrial design freedom. But for industrial or test equipment, that may not matter.
Cable and Wiring Harness Assembly
Internal wiring is a core part of any box build assembly. A poorly routed cable can cause intermittent faults or fail EMC tests. Our wiring harness builds follow strict procedures:
- Wire gauges and insulation types are selected per the designer’s specification
- All connections are crimped with calibrated tools; pull‑test values are checked per IPC-A-620
- Cables are cut to exact lengths and clearly labeled
- Strain relief is applied at both ends to protect solder joints or terminal blocks
- Routing inside the enclosure avoids sharp edges and high‑current paths crossing sensitive signals
For complex systems, we build custom cable assemblies using modular connectors. This makes field service easy and reduces assembly time.
Firmware Integration: Flashing and Programming in Box Builds
Firmware integration is a step many designers overlook. A box build assembly must handle software loading carefully to ensure every product works out of the box. We offer three common approaches:
- Pre‑flashed memory chips: The distributor or a service flashes ICs before they ship to us. Then we solder them onto the board. This avoids in‑line programming but requires careful version control.
- Designer pre‑programs and sends full assemblies: You flash the boards at your facility and then ship tested PCBAs to the box build partner. This works for low volumes but adds shipping cost and lead time.
- In‑line flashing by the assembler: We load firmware as part of the assembly line using a custom bed‑of‑nails test fixture. This requires NRE investment (typically $2,500–$5,000 for a gang programmer fixture), but it eliminates separate handling and reduces manual error rates from 1–2% to near zero. For secure provisioning with cryptographic keys, we integrate hardware security modules (HSMs) and encrypted programming channels. Without proper ESD protection on programming lines, a flash attempt can brick a board – a risk we eliminate through controlled processes.
Choosing the right method depends on volume and security needs. We always discuss these options during the design review.
Design-for-Box-Build (DFM) Tips for Engineers
To get the best results, apply these DFM rules before releasing your design to the box build assembly partner.
- Connector placement tolerance: Align board‑mounted connectors with enclosure cutouts. Allow ±0.2 mm positional tolerance from the PCB edge to the connector centerline. Insist on at least 0.5 mm oversize on the cutout to let the connector float.
- Three‑point PCB mounting: Screw the PCB at three points only. Two points define the plane; the third simply holds the board without constraining thermal expansion. A rigid four‑corner mount leads to stress cracks.
- Quản lý nhiệt: If components dissipate heat, bring them close to the enclosure wall. Use thermal gap pads (e.g., 1–2 mm, 3 W/mK) to couple heat. Define the pad location clearly in your mechanical drawing.
- Cable routing: Keep high‑speed signal cables away from switching power supply lines. Use cable shields and tie them to enclosure ground at one point only to avoid ground loops.
- ESD protection: All connector pins exposed to the outside world should have TVS diodes on the PCB. This prevents ESD discharge into the main circuitry during handling and field use.
- Panel mount vs. board mount: For connectors that see frequent plugging, use panel‑mount types that mechanically anchor to the enclosure wall, not just the PCB. Otherwise the solder joints will fatigue.
Following these rules reduces scrap by up to 30% in our factory.
Quality Control and Testing Standards in Box Build Assembly
“High quality” means nothing without measurable criteria. In box build assembly, we use IPC-A-610 as the benchmark for soldering and harness assembly. The relevant class (2 or 3) dictates acceptance.
- Class 2 (Dedicated Service Electronics): Permits some imperfections. For plated through‑hole solder fill, 75% minimum is required, but 50% may be acceptable in certain areas.
- Class 3 (High Performance Electronics): Mandatory for medical, aerospace, and mission‑critical equipment. No missing solder; hole fill must be at least 75% for all terminations. Crimp pull‑off forces have tighter limits.
We train all operators to IPC-A-610 Class 3 and perform regular internal audits. Our facility is ISO 9001 certified.
Beyond visual inspection, every box build undergoes:
- Functional test: Simulating real‑world inputs and outputs using a test fixture that interfaces with all panel connectors.
- Hipot test: Applying high voltage between line and chassis to check insulation, if the product is mains‑powered.
- EMC pre‑scan: Using a near‑field probe and spectrum analyzer to detect radiation hotspots before formal certification. This simple step avoids $10k+ re‑test charges.
- Firmware validation: Verifying that the correct version is loaded and the product boots and communicates with a test host.
For high‑reliability applications, we also offer burn‑in testing (operating the product at elevated temperature for 24–48 hours) to weed out infant mortality.
Cost Analysis: When Box Build Outsourcing Beats In-House
Let’s compare numbers. For a product with 300 units per year, the box build assembly cost breakdown typically looks like this:
- Enclosure (custom sheet metal, powder‑coated, including tool amortization): $25–$45 per unit
- Wiring harness (simple 10‑wire set): $8–$12 per unit
- PCB assembly (already costed elsewhere): BOM + labor
- System integration labor and test: $10–$15 per unit
- Firmware programming fixture NRE (one‑time): $3,000 spread over 300 units ≈ $10 per unit for first year
- Packaging and labeling: $3–$5 per unit
Total cost excluding PCB and electronics: roughly $56–$87 per unit. If you attempt to do this in‑house, you need a skilled technician earning $30/hour (with overhead $45/hour). A first‑time assembly of a 2‑hour build often takes 4 hours due to learning, costing $180 in labor alone – more than double. Factor in rework and damaged connectors, and the advantage of a specialised box build assembly partner becomes clear.
Sheet metal tooling compared to injection molding also shows a sharp break‑even. At 5,000 units total life, injection molding starts to save per‑part cost, but for short runs, sheet metal’s low tooling fee makes it the winner. Our purchasing team gets volume discounts on off‑the‑shelf components when you approach hundreds of units.
Common Box Build Assembly Challenges and How to Overcome Them
Even with careful planning, some issues appear frequently. Here are the top three and our solutions.
EMC compliance after integration: Internal cables act as antennas. A 30 cm long unshielded wire can radiate 5–10 dB above limits at 300–400 MHz. We mitigate this by routing cables close to the enclosure ground, adding ferrite beads, and using shield‑bonding backshells on all entry connectors. We also run an in‑house EMC pre‑scan to identify problems before formal testing.
Component compatibility: A connector from one vendor may not seat perfectly with another’s mating part. We verify mate‑ability in the planning phase. All incoming parts are sample‑fitted before volume production.
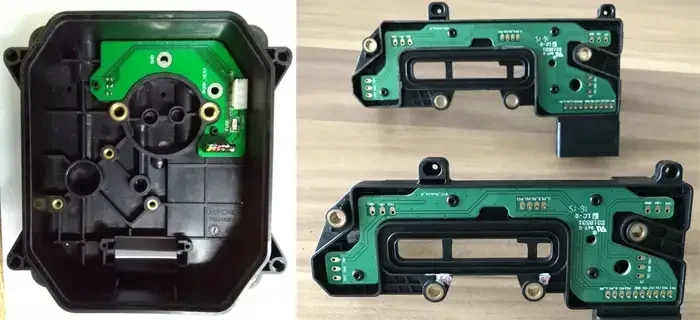
Supply chain delays: Custom sheet metal can take 4–6 weeks. We order early and, if possible, design the PCB to fit an interim off‑the‑shelf box for early testing. Communication with the client is key to adjust schedules proactively.
Frequently Asked Questions About Box Build Assembly
What is box build assembly?
Box build assembly is the process of integrating a PCB assembly, wiring, and other components into an enclosure to produce a finished, ready‑to‑use product. It includes testing, firmware loading, and packaging.
How much does box build assembly cost?
Cost varies by volume and complexity. For moderate volumes (100‑500 units), system integration labor alone typically adds $8–$15 per unit. Full turnkey including enclosure and wiring usually falls in the $50–$100 range per unit, plus BOM. Custom tooling for sheet metal starts around $500.
What testing is done during box build assembly?
Standard testing includes visual inspection per IPC‑A‑610, functional test via a test fixture, and sometimes hipot and EMC pre‑scan. For high‑reliability applications, we perform burn‑in. Testing standards depend on the required IPC class.
How is firmware handled in a box build?
Three methods: pre‑flashed memory chips shipped to the assembler, designer pre‑programmed boards, or in‑line flashing by the assembler using a custom test fixture. The last option minimizes errors and is best for volumes above a few hundred.
What materials are used for enclosures?
The most common custom material is sheet metal (e.g., 1.2 mm cold‑rolled steel) because of low tooling cost and ease of machining. Standard plastic or metal enclosures from distributors are also used for smaller runs.
What are the key DFM tips for box build?
Key tips: design connector cutouts 0.5 mm oversize, use three‑point PCB mounting, place heat‑generating components near enclosure walls with thermal pads, and route cables away from noisy power lines. These rules prevent stress and EMC problems.
How long does box build assembly take?
Lead time typically ranges from 6 to 8 weeks, including Sản xuất bảng mạch in (PCB), enclosure fabrication, and final system integration. Simple projects with off‑the‑shelf enclosures can be completed in 4 weeks.
Conclusion: Turn Your Design into a Reliable Product
Box build assembly turns a complex web of separate parts into one tested, certified, and deliverable product. With the right partner, you reduce vendor management, control cost, and ensure consistent quality. From sheet metal enclosure design and cable harnessing to firmware integration and EMC pre‑compliance, every step matters.
Our 20‑year track record in electronic manufacturing, combined with ISO 9001 certification and IPC‑A‑610 Class 3 trained operators, means you can trust us with your next project. Whether you are transitioning from prototype to production or scaling an existing line, we offer scalable, turnkey box build services that match your volume and budget.