


Bạn biết đấy. Bạn có một sơ đồ mạch hoạt động tốt. Bản vẽ bố trí PCB trông gọn gàng. Thậm chí có thể bạn đã nhận được mẫu thử và nó đã nhấp nháy, khởi động, đo đạc, truyền tín hiệu. Tuyệt vời.
Rồi thực tế ập đến.
Bây giờ bạn cần mười tấm mạch. Hoặc một trăm tấm. Hoặc bạn vừa nhận được sự chấp thuận để tiến tới giai đoạn sản xuất hàng loạt và đột nhiên hàng loạt câu hỏi nảy sinh. Ai sẽ chịu trách nhiệm tìm nguồn cung ứng linh kiện? Sẽ ra sao nếu một linh kiện bị hết hàng? Bạn có cần kiểm tra AOI, chụp X-quang, kiểm tra chức năng, phủ lớp bảo vệ không? Nhà máy lắp ráp có phát hiện ra lỗi bản vẽ mạch của bạn trước khi họ lắp sai 500 đầu nối không?
Bước nhảy vọt từ giai đoạn nguyên mẫu sang sản xuất chính là điểm mà nhiều dự án bị đình trệ. Không phải vì ý tưởng đó tồi. Mà bởi vì lắp ráp PCB là một nghề thủ công riêng biệt, và nếu chỉ làm “gần đúng” thì kết quả là bạn sẽ phải đối mặt với việc sửa chữa lại, chậm trễ, và các bo mạch hoạt động không đồng nhất giữa các lô sản xuất.
Vậy hãy cùng tìm hiểu cách thực hiện PCBA đúng cách. Những điểm khác biệt giữa giai đoạn thử nghiệm và sản xuất hàng loạt. Cần chuẩn bị những gì. Những tiêu chí cần xem xét khi lựa chọn đối tác sản xuất. Và làm thế nào để đảm bảo quy trình diễn ra suôn sẻ, dễ dự đoán và có thể lặp lại. Thực sự, đó chính là mục tiêu.
PCBA nguyên mẫu và PCBA sản xuất hàng loạt là hai chuyện hoàn toàn khác nhau
Việc chạy thử nghiệm mẫu thử thường không đòi hỏi quá khắt khe.
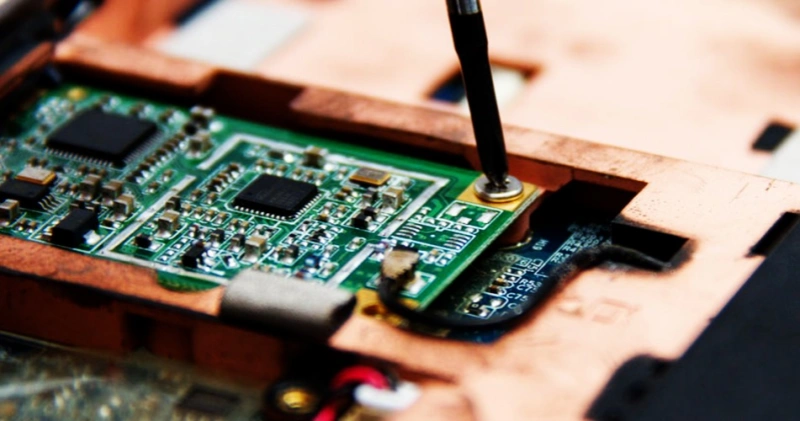
Nếu bạn đang lắp ráp từ 2 đến 5 sản phẩm, bạn có thể lắp tay một linh kiện khó lắp. Bạn có thể thay thế bằng một điện trở có giá trị khác. Bạn có thể nối dây tạm bợ cho tín hiệu. Bạn có thể hàn lại bằng lò nướng bánh mì và vẫn có thể gửi một sản phẩm mẫu cho nhà đầu tư.
Quá trình sản xuất không cho phép bạn làm điều đó. Quá trình sản xuất đòi hỏi sự nhất quán.
Một nguyên mẫu “hoạt động” không có nghĩa là bạn đã có một sản phẩm có thể đưa vào sản xuất. Bởi vì quá trình sản xuất sẽ đặt ra những hạn chế mới:
- Tình trạng sẵn có của linh kiện trở thành một cuộc chiến không ngừng.
- Hiệu suất lắp ráp Điều này rất quan trọng. Tỷ lệ lỗi 2% có thể chỉ là vấn đề nhỏ khi chỉ có 5 bo mạch, nhưng sẽ gây tốn kém khi con số lên đến 500.
- Chiến lược kiểm thử Điều này rất quan trọng. Bạn cần một cách để kiểm tra các đơn vị một cách nhanh chóng.
- Tài liệu trở thành một phần của sản phẩm. Không phải là tùy chọn.
- Kiểm soát chất lượng trở thành một hệ thống, chứ không phải một người chỉ đứng nhìn vào bảng.
Vì vậy, câu hỏi thực sự không phải là “chúng ta có thể lắp ráp được không”. Mà là “chúng ta có thể lắp ráp theo cùng một cách, mọi lúc, trên quy mô lớn không”.
Danh sách kiểm tra có vẻ nhàm chán nhưng lại cứu vãn dự án của bạn
Trước khi gửi các tệp đi gia công, hãy dừng lại một chút và đảm bảo rằng bạn có thể trả lời rõ ràng các câu hỏi này. Nếu không thể, bạn vẫn sẽ nhận được các bảng mạch, nhưng sẽ phải trả giá vì sự nhầm lẫn.
1) Danh sách vật liệu (BOM) của bạn có thực sự khả thi để sản xuất không?
A Danh mục vật liệu phù hợp cho việc chế tạo mẫu thử có thể gây ra rắc rối cho quá trình sản xuất.
Các vấn đề thường gặp:
- Mã sản phẩm của nhà sản xuất bị thiếu hoặc không rõ ràng.
- “Bất kỳ tụ điện 10uF nào” mà không ghi rõ điện áp định mức, kiểu vỏ, chất điện môi hay độ dung sai.
- Các linh kiện đã lỗi thời mà bạn lấy từ một bản thiết kế tham khảo cũ.
- Các mạch tích hợp (IC) có nguồn cung duy nhất với thời gian giao hàng kéo dài.
- Các bộ phận được liệt kê bằng biệt danh nội bộ thay vì mã đặt hàng chính thức.
Đối với quá trình sản xuất, bảng danh mục vật liệu (BOM) của bạn cần phải được liệt kê chi tiết. Ngay cả đến khâu đóng gói nếu điều đó có ý nghĩa. Nếu bạn sử dụng các linh kiện thụ động có kích thước rất nhỏ, điều này thực sự rất quan trọng.
Một phương pháp hay là nên bao gồm:
- MPN
- Mô tả và thông số kỹ thuật chính
- Các lựa chọn thay thế đã được phê duyệt (ít nhất là đối với các thành phần thụ động)
- Số lượng trên mỗi tấm và tổng số lượng
- Các ghi chú như “DNF” (không hoàn thành) hoặc “không được thay thế” đối với các mặt hàng quan trọng
Và đúng vậy, việc này có vẻ tẻ nhạt. Nhưng nó vẫn rẻ hơn so với việc dây chuyền sản xuất phải ngừng hoạt động chỉ vì ai đó hiểu sai về lựa chọn tụ điện của bạn so với dự kiến.
2) Các dấu chân và dấu hiệu phân cực của bạn có rõ ràng không?
Đây chính là lúc những sai lầm nhỏ có thể dẫn đến những khoản chi phí khổng lồ.
Các nhóm phát triển mẫu đôi khi phải dựa vào kinh nghiệm thực tiễn. Bạn nhớ rằng vị trí đặt chân của đi-ốt đã được đảo ngược nhưng bạn đã điều chỉnh lại trong bản vẽ bố trí. Tuy nhiên, nhân viên lắp ráp sẽ không nhớ điều đó. Họ sẽ tuân theo các thông tin trên bản in và dữ liệu tâm hình.
Thực hiện một lượt kiểm tra nhanh dành riêng cho công đoạn lắp ráp:
- Chỉ báo chân 1 trên các mạch tích hợp.
- Dấu cực trên đi-ốt, đèn LED, tụ điện điện phân và tụ tantali.
- Hướng của đầu nối đã rõ ràng.
- Các điểm định vị hiện diện và không bị che khuất bởi lớp in lụa.
- Vui lòng tuân thủ quy định về khu vực sân trong và khu vực cấm vào, đặc biệt là gần các khu vực có chiều cao lớn.
Nếu bạn có các linh kiện có khoảng cách chân cắm nhỏ, hãy đảm bảo rằng Diện tích bề mặt là chính xác và đã được đối chiếu với bảng thông số kỹ thuật, not copied from a random library. We have all done it once. It’s not fun.
3) Is your stencil and paste strategy right for the board?
Solder paste volume is one of those boring details that decides whether your assembly run is smooth or painful.
If you’re using:
- QFNs, BGAs, or LGA packages
- Large thermal pads
- Very small 0402 or 0201 passives
- Mixed technology with big connectors and tiny ICs
Then you might need stencil aperture modifications. Paste reduction on thermal pads. Windowpane patterns. Things like that.
This is not “over engineering”. It’s the difference between a board that passes reflow and one that bridges, floats, or tombstones.
4) What is your test plan?
If you only test by plugging in a cable and hoping it boots, that’s fine for five units. It breaks down fast later.
Production needs a repeatable, quick test process. Even a simple one.
Options include:
- Basic power rail checks.
- Boundary scan or programming verification.
- Functional test with a jig.
- In circuit testing if the volumes justify it.
At minimum, define what “pass” means. And how long a test should take. If the only way to test is a human poking around with a multimeter for 15 minutes, you’re going to feel it.
What “PCB assembly done right” actually means
There’s a lot of marketing in PCBA. Everybody says fast, high quality, low cost. All at once.
In practice, doing it right usually means you have a partner who can consistently handle these areas without drama.
Reliable sourcing, not just cheap sourcing
In production, component sourcing is half the job.
A good PCBA partner will:
- Flag risky parts. Long lead times, single source, NRND.
- Suggest alternates that match your specs.
- Confirm package types and reel sizes before ordering.
- Use traceable supply channels when required.
Cheap sourcing can be expensive later if it leads to counterfeits, mixed date codes, or inconsistent parts. If your product has to behave predictably, you want predictability in the supply chain too.
Process control: paste, placement, reflow, inspection
Assembly quality isn’t magic. It’s process.
A mature assembly line cares about:
- Solder paste printing consistency.
- Pick and place accuracy.
- Reflow profile matched to your board.
- Handling moisture sensitive devices correctly.
- Cleaning if you need it.
- AOI inspection, and X ray for hidden joints.
Even if you’re not ordering thousands of units, the same discipline applies. It’s what keeps yield high.
Communication that catches issues early
This sounds soft, but it’s huge.
The best assembly runs are the ones where someone messages you before building, with a short list of questions like:
- “This capacitor is listed as 10uF but no voltage rating.”
- “R15 is marked DNF in the BOM but has a placement file entry.”
- “U3 shows as QFN 4×4 but the footprint looks 3×3.”
- “Your board has no tooling holes. Do you want us to add a panel?”
That’s not annoying. That’s the kind of friction that prevents disasters.
DFM is not a buzzword, it’s your insurance policy
DFM, Design for Manufacturability, gets tossed around a lot. But at its core, it’s simple.
It’s designing so the board can be built easily, repeatedly, and with high yield.
A few DFM details that matter more than people think:
- Khoảng cách between parts so nozzles can place properly.
- Consistent orientation of polarized parts so placement and inspection are easier.
- Solder mask definitions that match your technology.
- Panelization that supports stable processing. Especially for small boards.
- Clear reference designators that aren’t hidden under parts or cut off.
And here’s the honest truth. DFM is often a loop, not a one time task.
You build prototypes, learn what was painful, adjust the design, then lock it down for production. That’s normal. That’s healthy.
NPI: the awkward middle stage you should plan for
If you’re moving from prototype to production, you will usually pass through NPI, New Product Introduction.
NPI is that in between stage where you’re not hacking anymore, but you’re also not fully stable.
This is where you should do:
- Pilot runs, like 10 to 50 units.
- Process validation.
- Test jig validation.
- Packaging validation.
- First article inspection.
- Revision control tight enough that no one is building “Rev A but with that one change we talked about”.
It’s not glamorous, but it’s where you build confidence that production won’t turn into firefighting.
A simple workflow that keeps things sane
If you want a straightforward path from prototype to production, this is a good baseline.
Step 1: Finalize design files
- Gerbers
- Drill files
- PCB stackup notes if relevant
- Bản vẽ lắp ráp
- Pick and place files
- BOM with alternates
Step 2: DFM and DFA review
- Manufacturing review
- Assembly review
Step 3: Prototype or pilot build
- Build a small batch
- Capture issues and corrections
Step 4: Lock revision and documentation
- ECO process
- Versioned outputs
Step 5: Production build
- Defined inspection and test
- Defined packaging
- Traceability as needed
It sounds obvious. It is. But “obvious” is also what teams skip when they’re rushing. Then the schedule punishes them later.
Choosing a PCBA partner without overthinking it
You don’t need a perfect manufacturer. You need the right fit.
Here’s what I would look for, especially if you’re shipping a real product and not just lab boards:
- Do they offer both PCB fabrication and assembly, or can they coordinate it cleanly?
- Can they support fast turns when you need it?
- Will they help with tìm nguồn cung ứng linh kiện, including alternates?
- Do they provide inspection options like AOI and X-ray when needed?
- Are they responsive with questions, not silent until the boards arrive?
- Can they support you beyond assembly, like testing, packaging, and ongoing runs?
The quality of communication matters almost as much as the machines. Because most PCBA problems are not “the machine placed it wrong”. They’re misunderstanding problems. Wrong part. Wrong orientation. Unclear files. Silent assumptions.
Where Philifast fits in
If you’re looking for a PCBA partner that can support custom electronics from early builds to production runs, this is where Philifast comes in.
They focus on the stuff that tends to matter most when you’re trying to ship something real:
- High quality PCB assembly
- Thời gian hoàn thành nhanh chóng when deadlines are tight
- Reliable manufacturing support, not just a hands off build
- Help across the process, so you’re not juggling five vendors and hoping they all interpret your files the same way
Looking for high-quality PCBA services?Philifast is here to support your custom electronics project with fast turnaround, reliable assembly, and full manufacturing support. Contact us today at flj-pcb.com for a fast quote.
Final thoughts
Getting from prototype to production is not about finding a factory and sending Gerbers.
It’s about building a repeatable process. Clean BOMs. Clear assembly data. DFM checks. A test plan that doesn’t rely on luck. And a manufacturing partner who communicates early, sources responsibly, and can deliver consistent quality.
If you do that, PCBA becomes boring.
And boring is exactly what you want when your product is on the line.
Câu hỏi thường gặp (FAQ)
What are the main differences between prototype and production PCB assembly?
Prototype PCB assembly is forgiving and flexible, allowing hand placement of parts, substitutions, and manual rework. Production PCB assembly demands consistency, manufacturability, component availability management, assembly yield optimization, robust test strategies, thorough documentation, and systematic quality control to ensure repeatable results at scale.
Why is having a well-defined Bill of Materials (BOM) crucial for production PCBA?
A clear and explicit BOM is essential for production because it prevents confusion and delays. It should include exact manufacturer part numbers (MPNs), detailed descriptions with key specs, approved alternates, quantities per board and total order, and notes like ‘do not substitute’ on critical components. This level of detail ensures parts are sourced correctly and consistently across large production runs.
How can I ensure my PCB footprints and polarity markings are suitable for manufacturing?
To avoid costly mistakes in assembly, verify that all footprints match datasheet specifications precisely. Clearly mark pin 1 on ICs, polarity on diodes, LEDs, electrolytics, tantalums, and ensure connector orientation is unambiguous. Include fiducials that are visible and not obscured by silkscreen. Respect courtyard and keepout areas around tall components to facilitate proper placement.
What considerations should be made regarding solder paste stencil design for production PCBA?
Solder paste volume critically affects assembly quality. For packages like QFNs, BGAs, LGAs, or boards with large thermal pads and very small passives (0402 or 0201), stencil aperture modifications such as paste reduction on thermal pads or windowpane patterns may be necessary. Proper stencil design prevents defects like solder bridging, floating components, or tombstoning during reflow.
Why is a structured test plan important for moving from prototype to production PCBA?
Production requires a quick, repeatable test process to verify each unit reliably. Unlike prototyping where informal testing may suffice, production test plans can include power rail checks, boundary scan or programming verification, functional tests using jigs, or in-circuit testing if volumes justify it. Defining clear pass criteria and test duration helps maintain quality while minimizing bottlenecks.
What does ‘PCB assembly done right’ entail beyond just fast and low-cost manufacturing?
‘PCB assembly done right’ means implementing consistent processes that produce reliable boards batch after batch without surprises. It involves meticulous preparation including buildable BOMs, accurate footprints with clear markings, optimized stencil designs for solder paste application, comprehensive testing strategies, thorough documentation integration into the product lifecycle, and systematic quality control—not just marketing promises of speed or low cost.

